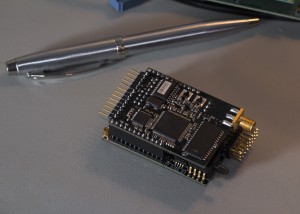
I’ve been a bit slow testing my Cormorant prototypes over the last few months. I have managed to complete the drivers for the IMU sensors and the data radio which cover most of the important hardware devices, so I thought now would be a good time to measure the power consumption. This is not just one simple number however, as Cormorant has many peripheral devices with many configurations each consuming different amounts of power.
Processing Architectures
So I was listening to a recent episode of The Amp Hour; “An off-the-cuff radio show and podcast for electronics enthusiasts and professionals“, and Chris & Dave got onto the topic of custom logic implemented in an FPGA vs a hard or soft core processor (around 57 minutes into episode 98). This is a discussion very close to my current work and I’m probably in a very small minority so I figure I should speak up. (more…)
New Avionics
I recently completed building the first of my new version of Asity, the avionics I plan to use in all my UAV activities. The main improvements in this version are the new inertial sensor chip I’m using. I previously had a separate accelerometer and gyroscope. Now I’m using the MPU-6000, which does both much better than what I had. It also does some motion processing of its own which I am dubious about, but I’m going to try it out and see if it can save me writing my own.
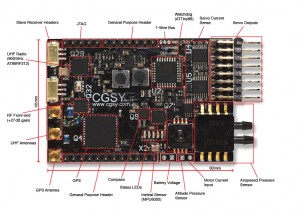
There are also a number a bug fixes I noticed while playing around with the last version. These are silly things like not including a bias inductor on a powered GPS antenna, supplying the wrong voltage to my compass, and forgetting to put decent pull-up resistors on an I2C bus or two. Fingers crossed that there aren’t more I didn’t find.
The most significant improvements are from a manufacturing view. Given that I’m assembling this by hand with a frying pan, I need to put some effort into the design to make it as easy as possible. This involved swapping a bunch of 0402 sized capacitors & resistors for their slightly larger 0603 versions. I also had to consider how I can fix things as I assemble it, so trying not to block access to my soldering iron. I also have a planned out assembly procedure that involves testing at a few stages. It’s much easier to fix some things before the board is complete, so I try to make sure it all works before continuing. Applying solder paste tends to be the messiest part and results in lots of tiny conductive balls rolling around your components if you do make a mess of it. I ordered some Kapton stencil from OHARARP to make this easier.
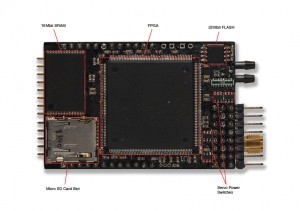
The bottom side of Asity is all hand soldered, so I made sure to choose the components and their layout wisely. This means: no 0402 sized components; no packages with hidden leads (QFN, BGA), and; everything nicely spaced so I can get my soldering iron between things. This last point may have been neglected a little, mostly because there isn’t enough space on the board.
I took two attempts to solder the FPGA on the bottom. The first time was a bit of a nightmare and I spent way too long poking at it with the iron to clear shorts etc. I decided that I had probably butchered the chip and that I didn’t really want it flying my aircraft. So I removed the first one completely, cleaned the pads and started again with a fresh one. It wasn’t a cheap part, but given the components on the others side aren’t particularly cheep either, and they were already working, I decided it was for the best. The second FPGA went on with much less fuss and also seems to work fine now.
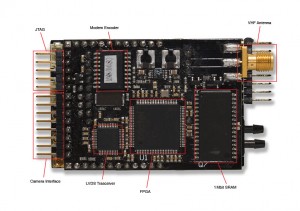
I’ve also assembled the daughter board that fits on top of Asity onboard the aircraft. This board includes a VHF radio to act as a backup link if the main UHF fails. It also has an interface to the camera in the nose of the aircraft as well as another FPGA and some RAM to process images data.
So far everything has tested well. I haven’t tried the radios yet, as I still need to assemble the other end of the link, but I’m feeling pretty confident about everything else. It all fits together nicely (there’s a massive radio module sandwiched between the two halves) and only weighs 53g assembled. Now I just have to fill it with useful code.
